Thursday, November 24, 2011

Fall Leaves

2nd and 3rd Graders created fall leaves before the Thanksgiving Break.First, we used rubber leaves to make a leaf print with white paint and little sponges to apply the paint. We used brown construction paper as a base for the leaves to make fall colors. When we were finished we set them on the drying rack to dry for the next class. Next, we used tempera paint, with warm colors (red, orange and yellow) mixed with copper paint to
create the background for the leaves. We used a little sponge (cut from large sponges from the dollar store) and clothespins to BLEND the colors together. The clothespins also help to keep their hands a bit cleaner. It is difficult to paint with such large classes and wash hands, so the clothespins help. Lastly, we use a black permanent marker to add a border and bring out the veins of the leaves.

Fine Art Award

Herrera is known for and has earned the title of a "Fine and Performing Arts School." This year we have created a new way to honor students who have excelled or improved greatly in the arts. Every month I choose one or two students (depending on the month) to receive this award. We invite parents and family members and give them a trophy to honor their hard work. I will continue to post the pictures of the students I have chosen in the upcoming months!!! Great Job Herrera Artists!! I am so proud andinspired by your talent, effort, leadership, and determination to excel in my class!!

Spiders... AAHHHH!!!

Kinder and 1st graders created spiders and spiderwebs for the fall season I use this lesson to teach "Circles and Lines." The web is created from circles and lines, as well as the spider!! First we create the spider web with a white crayon. When they are close to finished, I start going around the room to add glitter!!! We LOVE glitter!!!!! Prior to the next class I prepare a black square and strips of black construction paper. The students cut a circle from the square and glue the circle and the strips to the web. Next, Each student receives a white crayon and they draw the face on the spider. I remind them that they can make the spider any way they choose (scary, silly, happy, etc.).

Friday, November 18, 2011

Tasty Mondrian

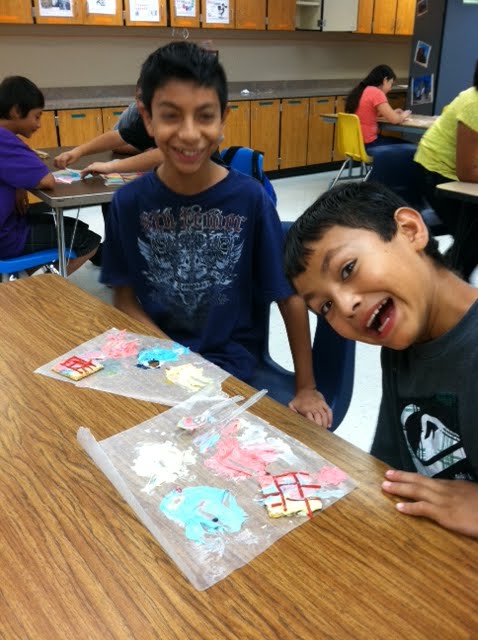
Junior High students have been asking to make another "Tasty color Wheel " from last year, However, we are right in the middle of creating our art timeline. We had just finished out last artist, and we were about to begin our Mondrian lesson, and I thought... " Tasty Mondrian!!!" There were a lot of similarities between the color wheel (look in a previous Junior High Post)and the Mondrian lesson, but some of the main differences were that I used Graham crackers instead of vanilla wafers. Also, we used twizzler pull and peel to create the lines ( I tried to look for black but could not find any). Each student received one cracker to work with but they had to share the icing. It was fun, educational and delicious!!!


Yummm! Color Wheels!!!

Every Wednesday we have "Super Special Wednesdays," which are days that we get selected classes for a longer time. This allows classroom teachers to meet for professional development. It also allows special area teachers to have some extra time with their classes. I like to use this time to create lessons that I would not have time for during the regular class time. This lesson, Tasty Color Wheels, is a perfect example of one of those lessons. We use white frosting, food coloring, and vanilla wafers for this project. I have found that wax paper works best to keep the tables clean. I remind students of a few things before we begin... they will get a chance to eat it at the end so please be patient and wait, only touch the food that you will eat, take turns mixing colors, and don't put too much food coloring (your teeth will be blue!!). Also, it is important that after you mix the primary colors (red, yellow,and blue) and you begin to mix the secondary colors (orange, green, and purple) that you only take a small amount of primary colors. For example, if you take all of the red and blue to make purple, you will not have any red left for orange or blue left for green. This is a wonderful lesson about the color wheel and color mixing, as well as so much fun!!!


Wednesday, November 9, 2011

Where are the students? (Michelangelo)

At first glance, the picture above looks as though it is an empty classroom, However... If you look closely you will see that my students are underneath the table!! You may be wondering WHY? Well, 4th and 5th graders have reached Michelangelo on our timeline! Michelangelo painted the ceiling of the Sistine Chapel. We had a long talk about what they thought about his artwork before we began. Most of they students liked it and thought that it was very realistic. Next, I told the students about how he painted it on top of scaffolding on his back for YEARS!! Then, I told them their assignment... We had to create a fall/ Halloween illustration under the tables!!! We used tape to stick the paper to the table and carpet squares on the floor (because we all know that the art room floor can be a glittery mess). We used crayons, instead of paint because I did not want students to get paint in their eyes or on their face. Students really enjoyed this project but were complaining how difficult it was to paint like Michelangelo. It was very difficult for students to draw like him, and some were getting discouraged that their pictures were not turning out how they wanted them to look. I told them that this project was more about the process than the product. I really wanted them to gain an appreciation for Michelangelo and his work. After we were through, I asked the students again what they thought of Michelangelo and his work, and instead of the students saying, "I like it," they all said something about the process, for example, "He must have been really strong!' or " I really appreciate how much work he put into his work!!"


Friday, November 4, 2011

Mona Lisa with a twist!


4th and 5th graders are continuing on through our timeline and we have finally reached LEONARDO DA VINCI and his most famous artwork, the MONA LISA. We learned many interesting facts about her and the painting. (for example, did you know that originally Da Vinci painted her hair in a bun and later changed it to the way it is now?) We also made inferences on why she has that expression on her face. All of the students were amazed by the amount of detail and how he painted so realistically. After our discussion we decided to create a new environment for her... Mona Lisa with a Twist. I am continuously inspired and impressed by the creativity and imagination of kids. We had president Mona Lisa, Bridal Mona Lisa, DJ Mona Lisa, Fortune teller Mona Lisa, Sponge bob Mona Lisa, Dragon Mona Lisa and even an Angry birds Mona Lisa (just to name a few). Stay tuned for the next post about Michelangelo!!


Thursday, November 3, 2011

Jackson Pollock at Herrera


Junior High is still working on our art timeline, and we have finally reached Jackson Pollock! First, we discussed Jackson Pollock's work and they each had to write a paragraph whether they thought it was art or not and why. We also learned that he actually went to our school district as a child.. SO COOL!!! The students were really excited about painting this one because it is a wonderful excuse to make a mess with paint!! We started with an old painting of mine that has been in my closet for years and I did not mind covering up. We first put two layers of gesso on it and then let it dry. The next day, I laid out a large area of butcher paper to protect the floor. I only allowed the students about 4-5 colors (including black and white). I have found in the past that if you allow too many colors the canvas gets really "muddy" looking. We used black, white, copper, dark teal, and yellow. We used acrylic paint on the canvas, but instead of paintbrushes we used paint stirrers and marbles (that I made out of fimo dough) to throw or bounce off the canvas. We also used our hand prints on the canvas just like Jackson Pollock!! I only allowed about three-four students at a time to work on the painting so we would not splash paint on each other. We had a great time, learned a lot about Jackson Pollock and created a beautiful "Action Painting!!"